 This is my first blog post on this site pertaining to my work. I've written others in the past, but it's nice to start fresh and have a place to share what I'm working on with others! Anyway, I am currently working on a "Giant Yoshi Amigurumi" for my boyfriend. I have been keeping it a secret as best I can, and not even saying a peep online about it. I want to share my progress though, and develop my blog to show some of my processes with others (maybe even inspire someone to make something they imagined)! This project started out with an idea at the beginning of this year. My boyfriend and I went to ACEN (An anime convention) together for the last couple years. We went one year and there was this GINORMOUS Yoshi stuffed animal. My boyfriend was excited about it, and really wanted it. It was $200-300 however, and the price deterred him from buying it. Last year when we went to ACEN, we looked EVERYWHERE for the giant yoshi, my boyfriend was still dead set on getting him. Sadly our efforts were in vain, because there were only tiny yoshi stuffed animals there. He settled on purchasing a giant panda squishable stuffed animal instead. Of course I bought myself a big alpacaso stuffed animal for myself too! I've always had a soft spot for them, so it was only natural that I had to have him. (I named it Bartholomew). I wanted to make the giant yoshi for my boyfriend for a big present to honor his birthday (March 12th), our 4 year anniversary of dating (March 8th), and Valentines day, but I obviously bit off more than I could chew haha~ I was a little over-ambitious for the time frame I was working in. 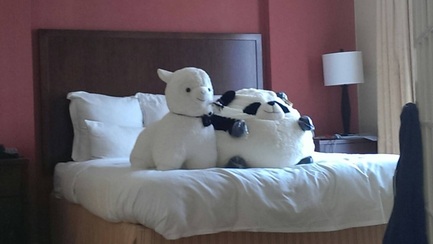 So, the idea was born to make my own giant yoshi stuffed animal for my boyfriend. I searched online and couldn't find one for sale - OR even a photo to reference. I did however, stumble upon this photo below. 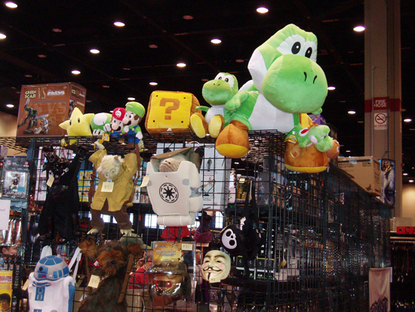 I drew out my plan of action, and went to work crocheting and making up my own pattern. I basically made up what I was doing as I went, and wrote down what I did for future reference. I also used another reference photo of Yoshi so that I could get all the details of him down perfectly. I didn't quite like how frumpy the first reference photo looked, so I upgraded him to look better~ C: 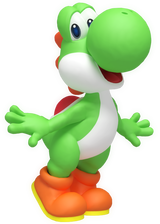 Before long, I had the head put together. I then finished the body, his tail, and an arm. I crocheted a small sack to put some beads (Same ones I used for my Tiny Tina Bunny!) to weigh Yoshi down some to stabilize his head weight and put it into his body. Currently I am working on his fingers on his other arm, which should be finished today. I still need to make his legs/feet, the shell on his back, the horns on the back of his head, and add details (eyes, white patches, nostrils) too. Here are some progress photos to enjoy: Of course, I wanted to make things to accompany Yoshi too.. I'm almost finished with the original health gauge flower from Yoshi's Island! I loved that health flower for some reason growing up, so I had to make it. Above is my progress of it thus far. I have to make the other petals, and add paint accents to it to complete it. I was making this one first, but put it on hold because I started the yoshi amigurumi trying to make a deadline. I also may make a Yoshi Egg that opens up and doubles as a remote holder, but we'll see how far my aspirations go on that~
Wish me luck on finishing this big project! And thanks for taking the time to get insider info on my Yoshi Amigurumi! <3
0 Comments
Leave a Reply. |
Aeishi
Behind the scenes of my projects, patterns, and more! Archives
November 2020
Categories |
 RSS Feed
