|
[ October 13, 2020 -- EDIT: ] I posted an updated version of this pattern here on my blog, so check it out! Hopefully it will clear up any confusion or questions that people have had, I also plan to post it on Ravelry :) I came up with this pattern to share because I was asked by Vanessa for a pattern. It's a simplified version of the first ghost I originally made for my fiance. I aim to make a more authentic ghost one day and make it look closer to the actual ones but I'm happy with this version for now, the shapes of them are a bit complex so I simplified the design to get a basic form. Feel free to share your work with me, I'd love to see what you come up with and Happy Crocheting!! :) If you have any questions while making it, feel free to ask me!
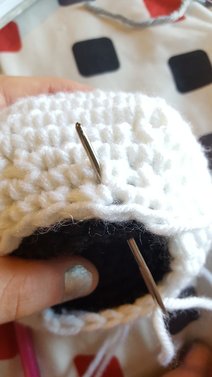
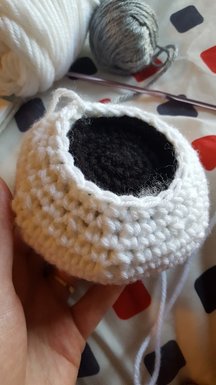
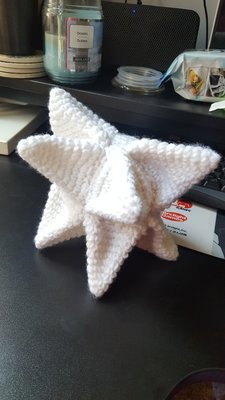
Destiny Ghost Version 1 Crochet Pattern by Saekoi Shop Terminology: sc - single crochet st - stitch inc - increase (2 sc in one stitch) dec - decrease (combine 2 stitches together) (sc, inc) around <- means repeat what is in parenthesis until you complete the row Note: When decreasing in the body you can use an invisible decrease if desired (decreasing in the front loops only). For mine I did so to help keep from getting large gaps. Materials: G Hook - Used for whole pattern White Worsted Weight (WW) yarn Black WW yarn Silver/Grey (shiny grey) WW yarn Polyfill Felt (in desired colors) Hotglue (stitch markers, yarn needle, scissors) Main Sphere "body": (White) 6 in magic circle inc around (sc, inc) around (2sc, inc) around (3sc, inc) around (4sc, inc) around (5sc, inc) around (6sc, inc) around sc around sc around (6sc, dec) around (5sc, dec) around (4sc, dec) around (3sc, dec) around slip st next st fasten off with tail Sphere "face": (black) 6 in magic circle inc around (sc, inc) around (2sc, inc) around (3sc, inc) around slip st next st fasten off - long tail not needed Stuff "body" and attach sphere to the face, use white tail to sew in the "face" piece. You'll want to leave a row of stitches between the face piece and the sphere to create a "lip", so sew in the face piece (using the body's tail) through the last row of stitches on the body. Make sure well stuffed before completely sewing closed. It will look like the photo below once the face is sewed in place.
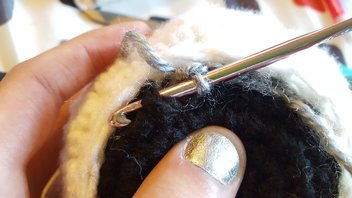
Next, single crochet with the grey yarn around the inside lip created between body and the face pieces. Crochet into the edge stitches of the face piece. Once fully around the circle, you can finish off and leave small tails. Pull the tails into the piece.
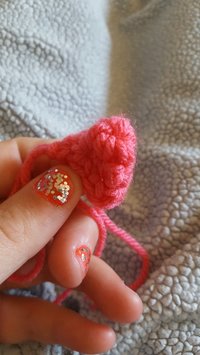
Pyramid pieces: (White) x8 Note: Continuously crochet these pieces - I wrote this in a row format when the actual stitches overlap formal rows, so after you complete one "row" continue into the next part ignoring the "rows" until the end. I'll adjust the pattern to fit the proper row format when I get the time :) ie) 5 stitches in magic ring then (sc, inc) 3 times - this technically overlaps a "row" with the last increase. Still (sc, inc) 3 times, but continue the stitches that are stated until you complete them and ignore rows. 5 in magic ring (sc, inc) 3 times sc, inc, sc, inc, 2sc, inc 2sc, inc, 3sc, inc, 3sc, inc 3sc, inc, 3sc, inc, 4sc, inc 5sc, inc, 6sc, inc, 5sc, inc 6sc, inc, 5sc, inc, 6sc,inc (7sc, inc) 3 times (8sc, inc) 3 times (9sc, inc) 3 times slip st next st Fasten off with tail Make sure to pinch the pyramid pieces to create 3 creases and give a pyramid shape to them. the increases should be along the creases. You'll want to keep this shape and sew them onto the body.
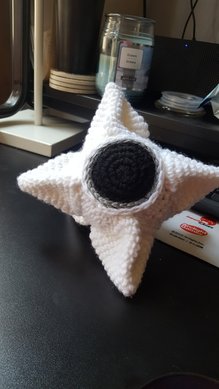
After all 8 pyramid pieces are made, attach pyramids to the body, lining up with each other. I recommend sewing in the four around the face side first, then the four on the backside.
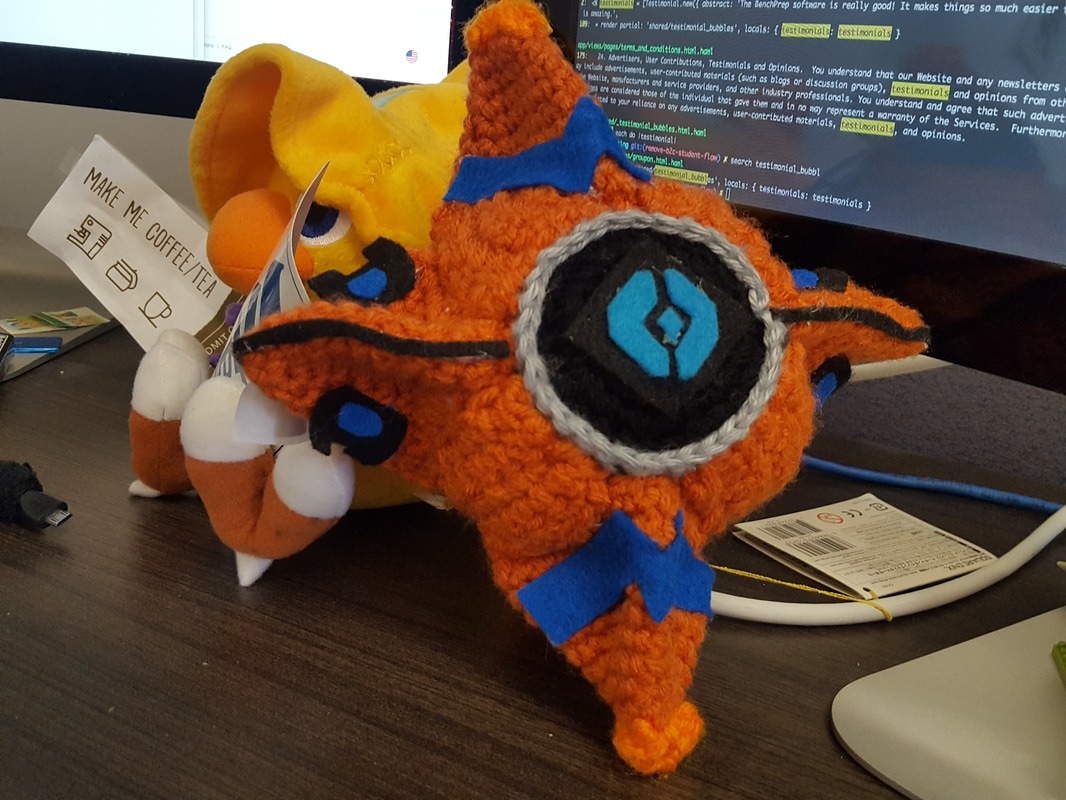
Final Steps... Add desired details with felt and hot glue. Customize as you wish~! :) 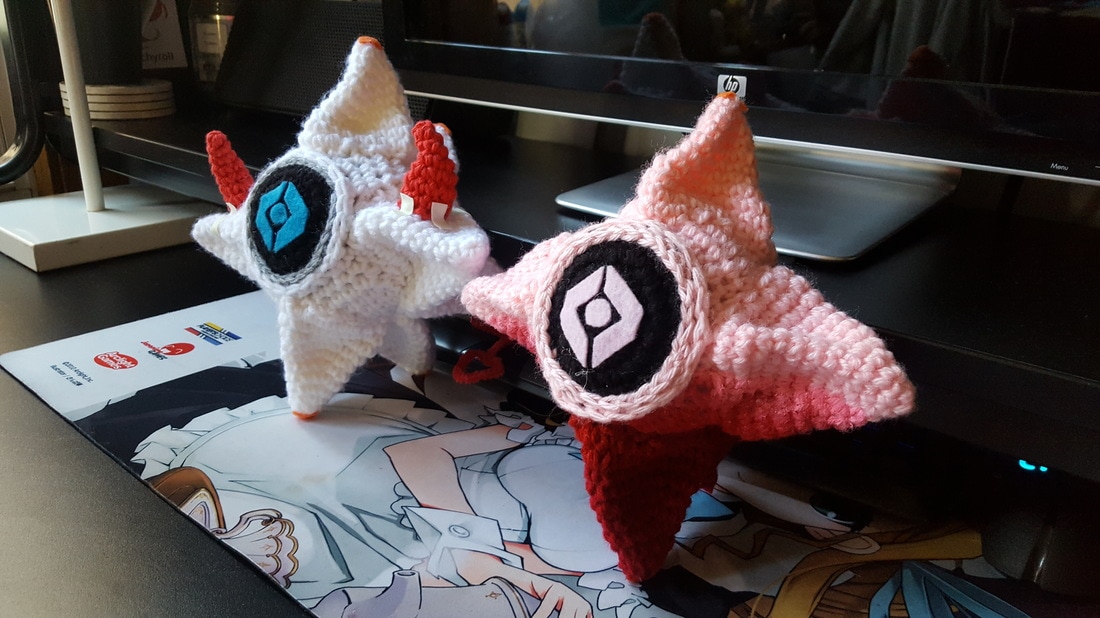
6 Comments
Leslie
3/8/2019 05:27:24 pm
Hello! I'm trying to make one of these for my husband but I'm getting confused on the pyramid pieces. The stitches you have listed to do on each round dont add up or end with the correct amount. Is it a typo on your end or am I just screwing something up?
Kendel
3/14/2019 11:45:38 am
Yah I see what you're talking about. There's not enough stitches in most of the rounds to complete the stitches listed. Like with only 5 stitches in the magic ring you wouldn't be able to do the last increase on the next round.
Ashley (Saekoi)
3/16/2019 12:07:57 pm
I was messaged by Kendal on Facebook to take a look at the issue. (Thanks for drawing this to my attention! ) I can see where there is confusion on that portion, it's the way I wrote the pattern that caused it. In the pyramids I wrote it as I made them, I didn't structure the pattern in that part to coincide with perfect rows and broke it up as if they were rows in the pattern itself - when that portion is supposed to be continuous.
Leslie
3/25/2019 06:53:36 pm
Thank you so much! I've been working on a pattern as well and I'm stuck on the dang triangles lol! Really appreciate you looking at it!
Sara Lippert
9/11/2019 11:17:54 pm
My boyfriend is going to love this for his birthday! Thank you so much for going through the trouble of making a pattern, you are a lifesaver. I'm attempting to make his with the Hunter Skin with the blue snake. Fingers crossed it turns out as good as yours!!
Zoe
8/26/2020 06:38:58 pm
I’m confused on the sc inc (3times) so am I repeating that sequence 3times then move on to the next direction Leave a Reply. |
Aeishi
Behind the scenes of my projects, patterns, and more! Archives
November 2020
Categories |


 RSS Feed
