 It's been 3 years since I've released my pattern into the world, and a few people have tackled it. I decided to revamp the pattern with more detailed assembly photos - this hopefully helps with any confusion that arose from the previous version. I tried to make it more beginner friendly. I have also rebranded myself from "Saekoi Shop" to Aeishi Crochet. I have made this uniform across all of my platforms, sorry for the name change but I felt it better represented me and my creations! I added this pattern to Ravelry. There is a PDF file to download at the bottom, as well as a link to my google document version of it. Let's get onto the pattern~ 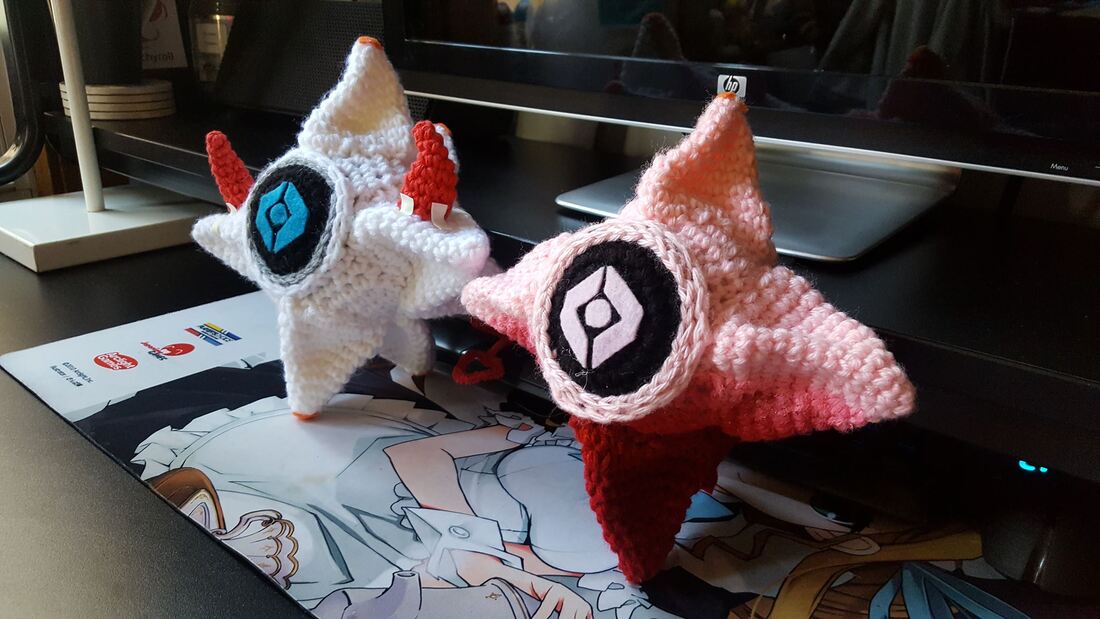 Destiny Ghost Amigurumi By: Aeishi Crochet Terminology Used: sc - single crochet st - stitch inc - increase (2 sc in one stitch) dec - decrease (combine 2 stitches together) Magic circle (or magic ring) - look up youtube tutorials if you are unsure of what this is :) Materials: G Hook - Used for whole pattern White Worsted Weight (WW) yarn Black WW yarn Silver/Grey (shiny grey) WW yarn Polyfill Felt (in desired colors) - for customization Hot glue - for customization (stitch markers, yarn needle, scissors, other items to customize as needed) Note: (1 sc, 1 inc) around (18) <- This means to repeat the sequence in parenthesis until you complete the row. The numbers in parentheses at the end of each row in the pattern are how many stitches there should be completed at the end of the corresponding “row”, I added these to make the pattern for aid if needed.
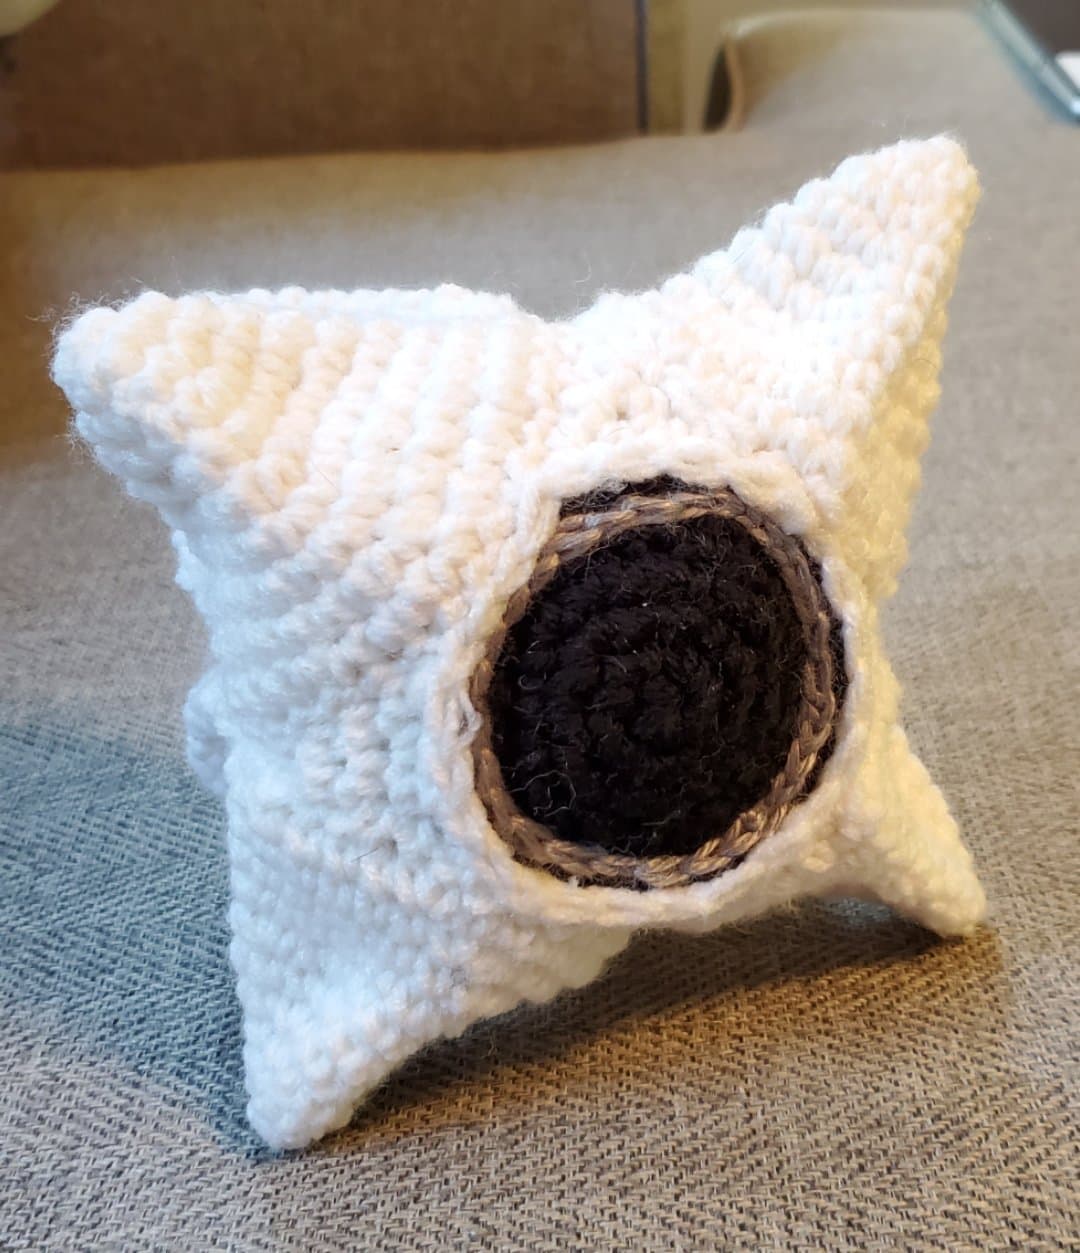
Detailed Assembly Instructions: 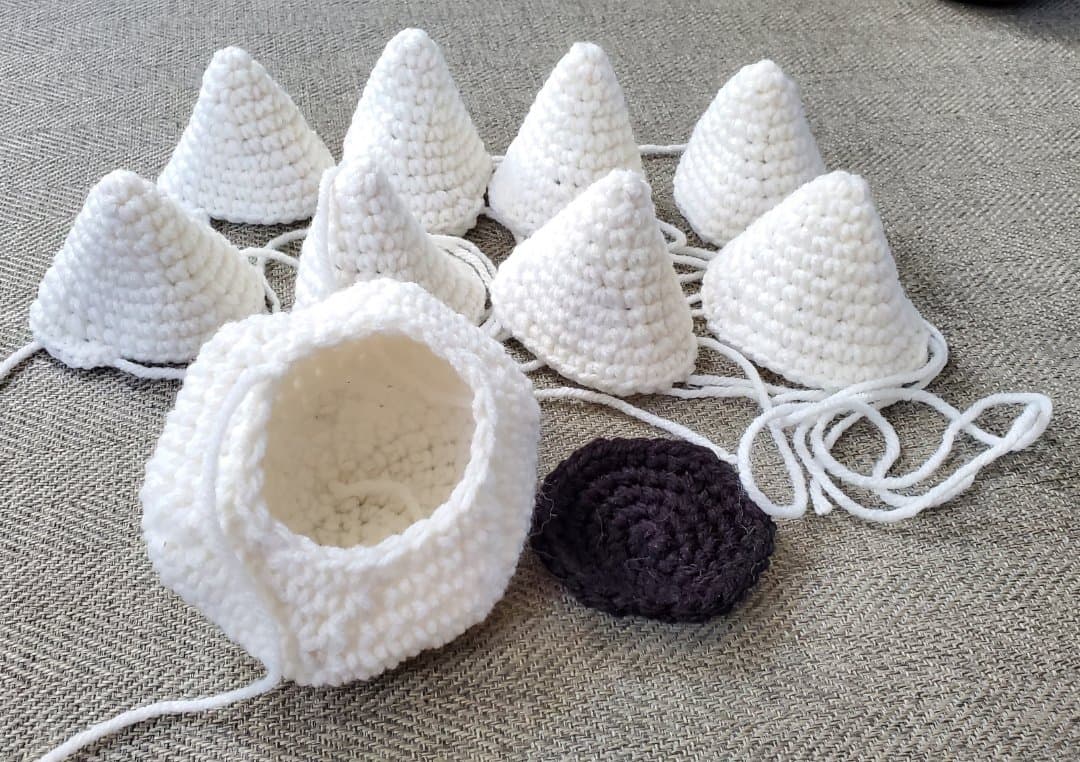 There are 10 pieces to sew together. This is the process that I take to assemble the ghost, I have gotten many questions about the pyramids in the pattern - so I’ll try to be as detailed as I can on my explanation. 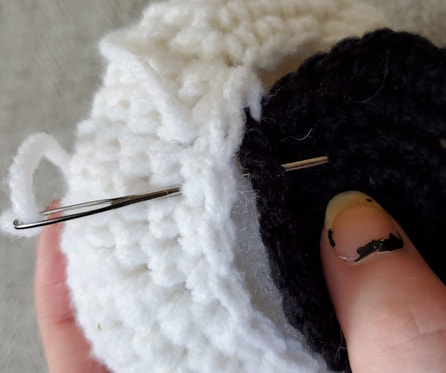 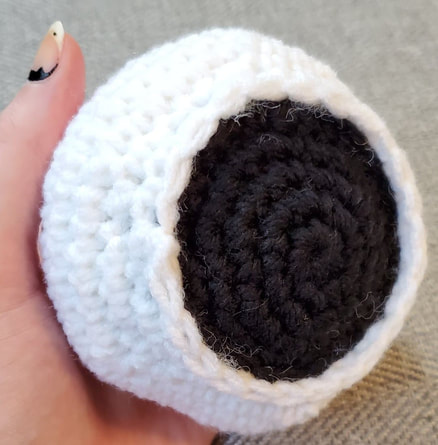 First stuff the “body" and attach the body sphere to the face. Use the white tail from the body sphere to attach the "face" piece. You'll want to leave a row of stitches between the sphere face and the sphere to create an "overhang", so sew in the face piece through the last row of stitches on the body. Make sure the body is well stuffed before completely sewing closed. It should look like the photo above, with the face fully attached and stuffed.
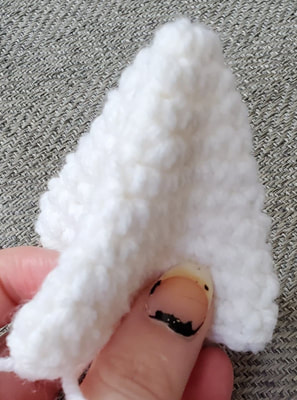
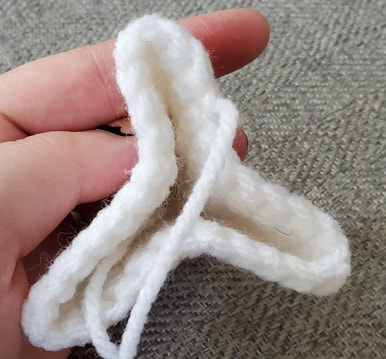
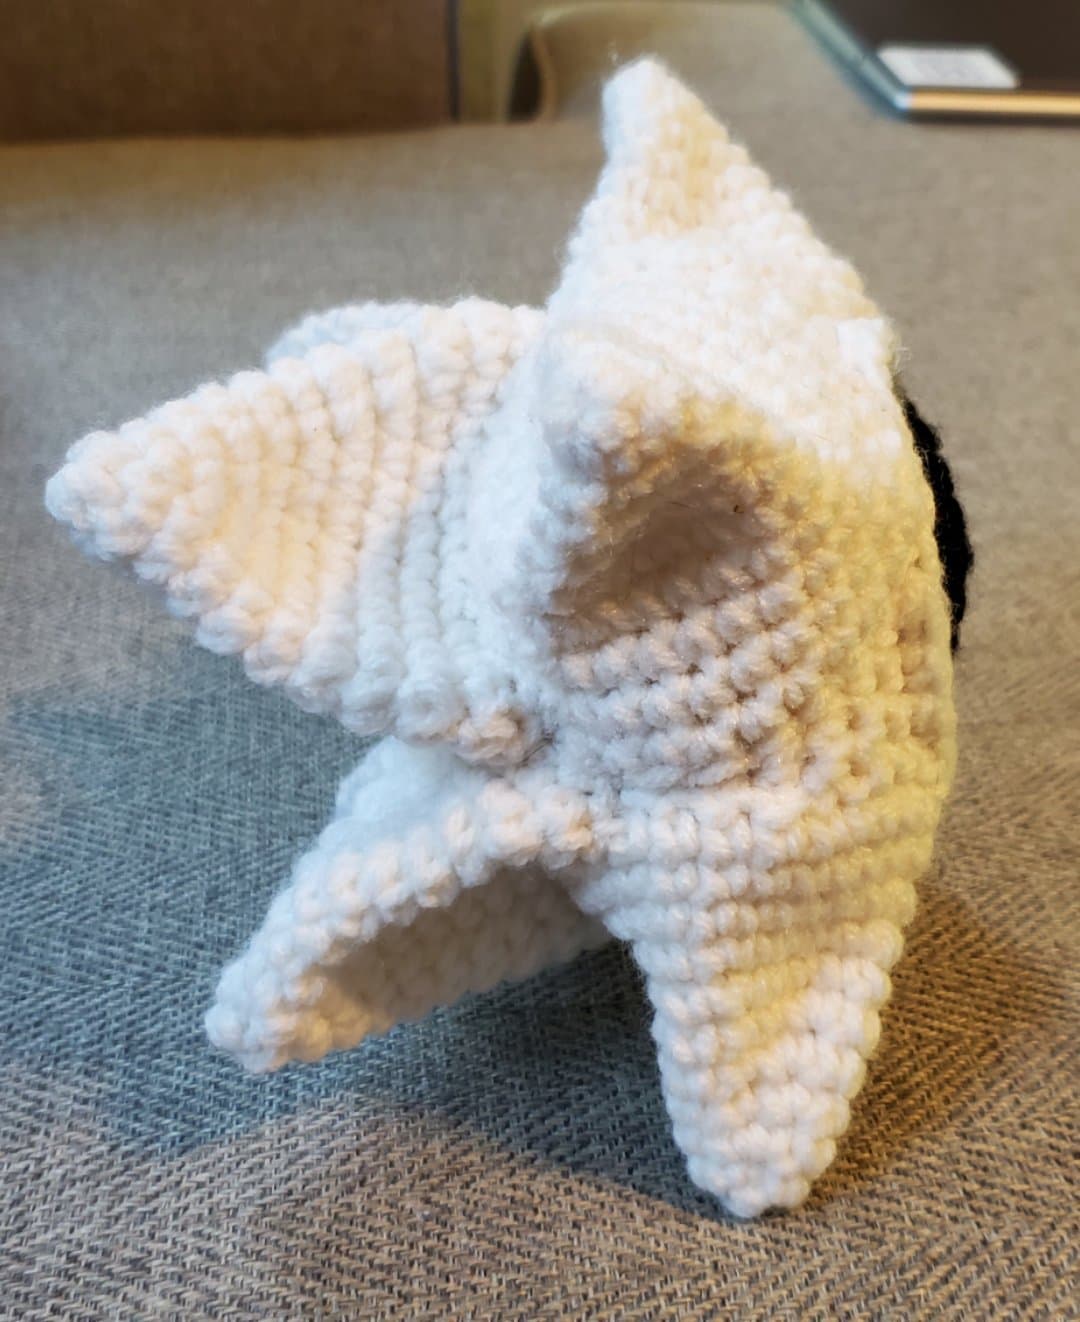
To form the pyramid shape from the cones that were made, pinch the cone to where the increases are on the edges. This will create the 3 creases and give a triangular or pyramid shape to them. You'll want to keep this shape and attach them onto the body. Do not stuff them. 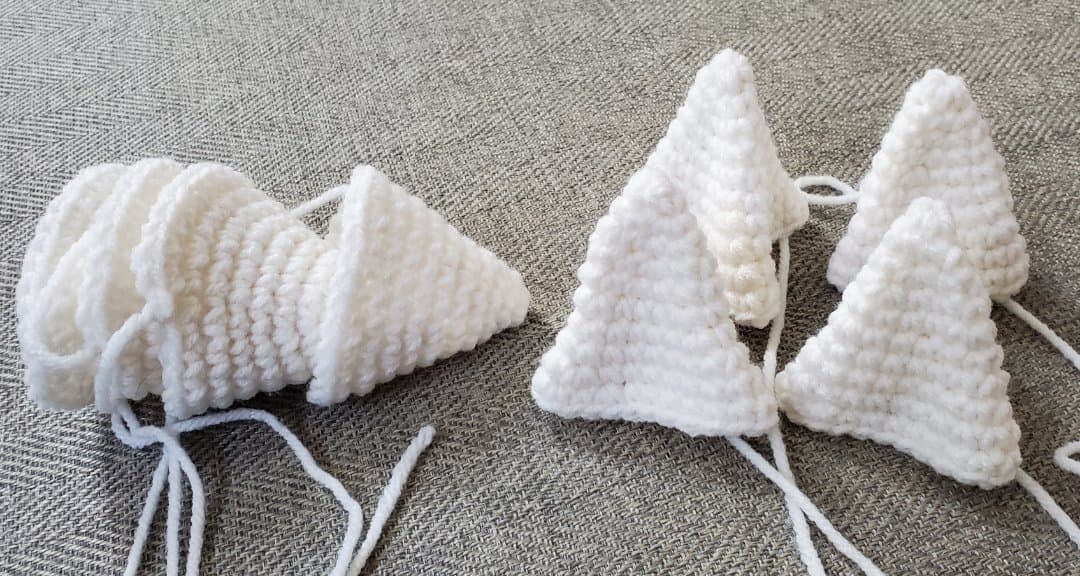
They will look like this from the bottom after pinching together to shape them. This is for shaping purposes, when attaching them the sides do not have to be fully pressed in like above. 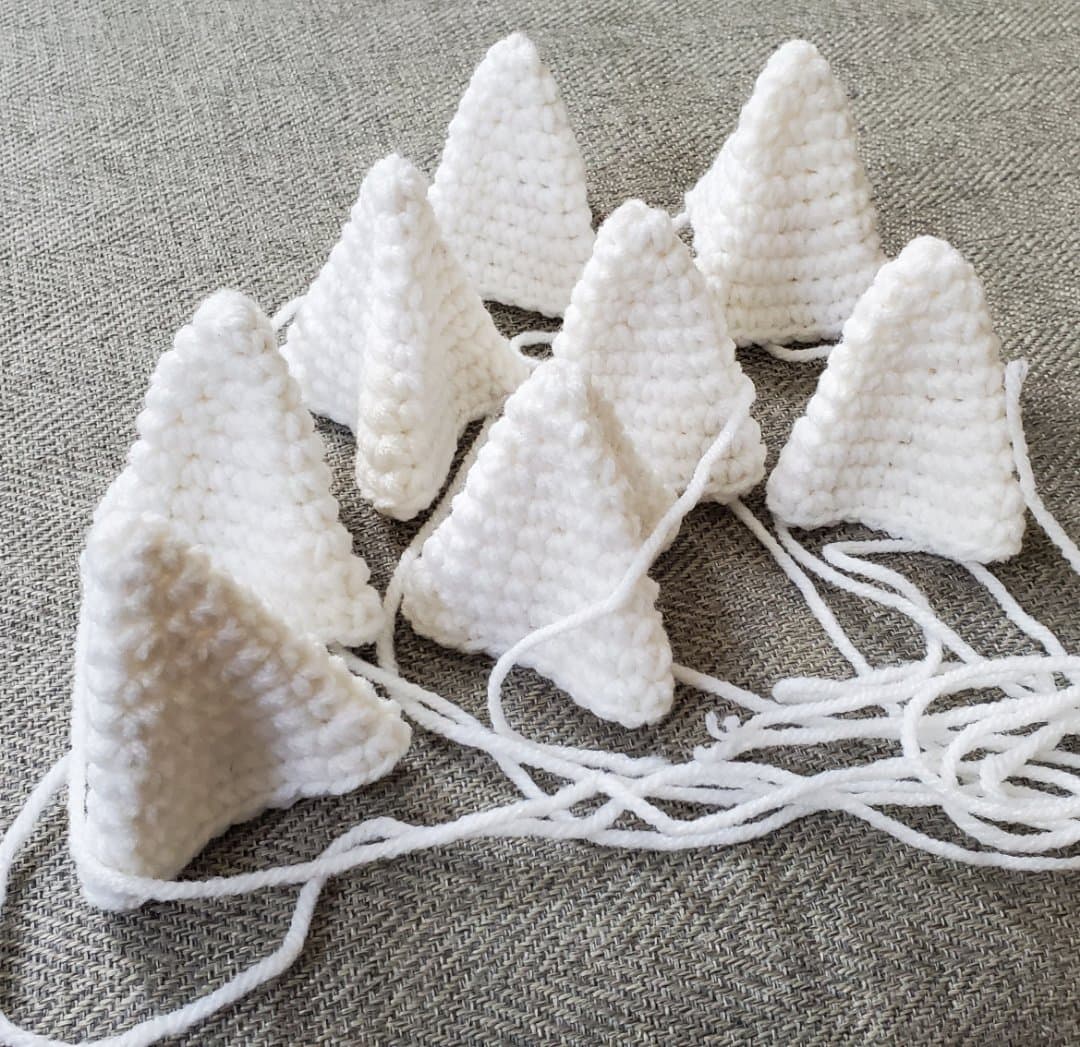 They will go from looking like a cone to a triangle shape, do this to all 8 of them. 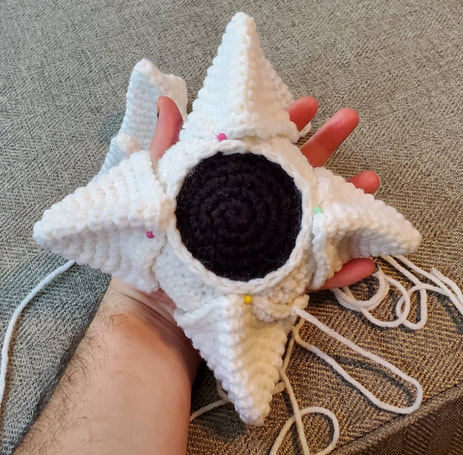 I recommend attaching the four pyramids around the sphere’s face side first, then sewing them / attaching the four to the backside afterwards to make alignment easier. Have the corners facing the front on each of the ones around the face. 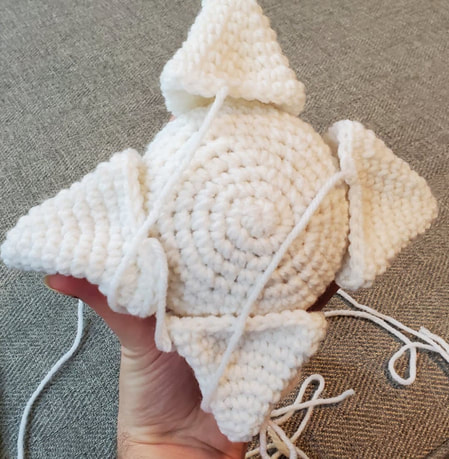 The back side of it looks like this. I put the tail side of them on the backside to start attachment. 5 rows away from the magic circle on the body, I sew in the back of the triangle and work my way around. I relax the shape of the sides as I sew in the piece, and retain the creases to keep their shape. It will look like below when attached. 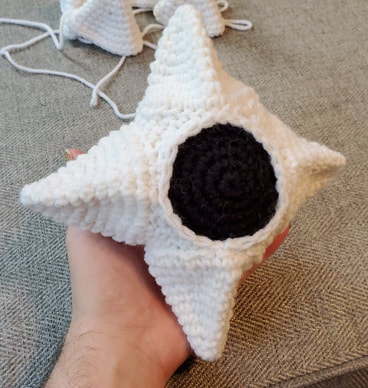 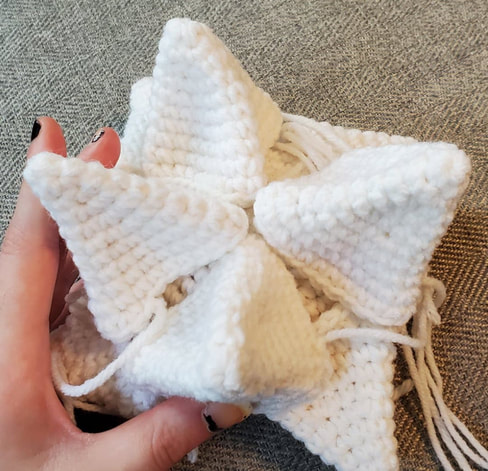 For the back pieces, I position them to where the creases meet at the magic circle of the body. Then I attach them and cover the remaining space of the body sphere. 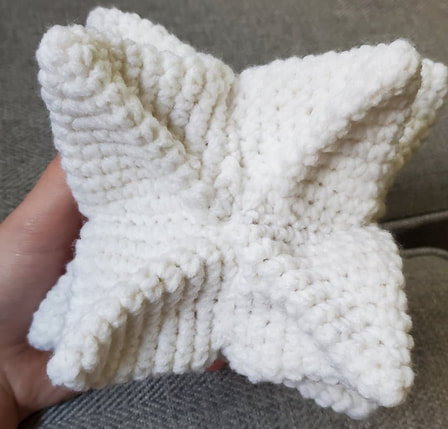 It should look like the above image once fully attached.
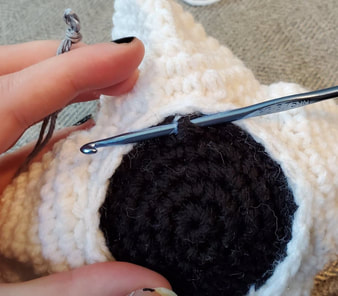
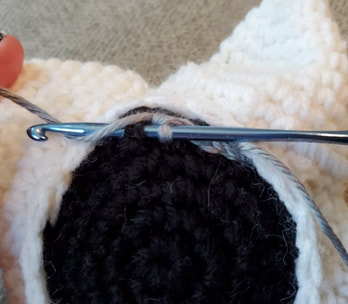
 With the grey yarn, single crochet into the edge stitches of the face piece, this will be around the inside lip created between body and the face pieces. Once fully around the circle, you can finish off and leave small tails. Pull the tails into the piece with a crochet hook. (( You can do this part after attaching the pyramid pieces, or before doing so. The order of doing this part doesn’t matter - I just did it at this point. ))
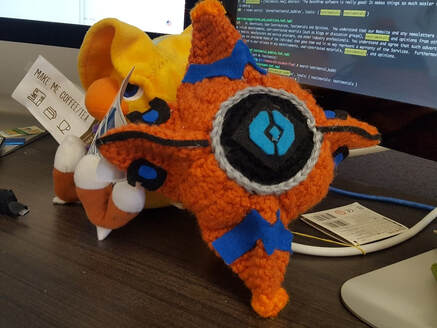
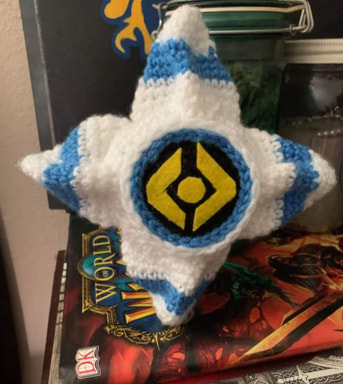
After following all of the above, you should have the base ghost (above photos) completed! Final Steps... Add details with felt and hot glue. Customize as you wish and be creative~! :) Crocheting with different colored yarns also is an option to achieve the look you desire.
PDF File of the pattern below:
4 Comments
Gabriella
7/3/2022 01:13:38 pm
My older brother is a huge fan of Destiny 2 and this pattern was an awesome one to use for his birthday this July 4th! Thanks so much for the pattern. I really enjoyed making it and my brother will love this! ;)
Ashley (Aeishi Crochet)
7/17/2022 07:10:53 pm
Thanks for using my pattern Gabriella! :D Your brother will have a happy birthday getting a gift made special by you~!
Michelle
12/18/2022 11:41:55 pm
Hello. I have a little question.
Dani
6/21/2023 03:14:40 am
This pattern was great! My partner loved his own ghost. Thank you for sharing!! Leave a Reply. |
Aeishi
Behind the scenes of my projects, patterns, and more! Archives
November 2020
Categories |
||||||||||||||||

 RSS Feed
